If you’ve ever rewired a light fixture, swapped out a faulty automotive sensor, or repaired a damaged wire harness, you’ve probably worked with a pigtail connector—whether you knew it by that name or not. In both residential electrical work and modern vehicle wiring, pigtail connectors solve a problem that plagues every electrician and technician: how do you safely connect, extend, or repair wires without replacing an entire harness or fixture?
This guide breaks down everything you need to know about pigtail connectors—what they are, the types available, where they’re used, and how to install them properly. Whether you’re an automotive technician, an OEM sourcing manager, or a DIY enthusiast, this article gives you the practical knowledge to specify, install, and maintain pigtails with confidence.
What Is a Pigtail Connector?
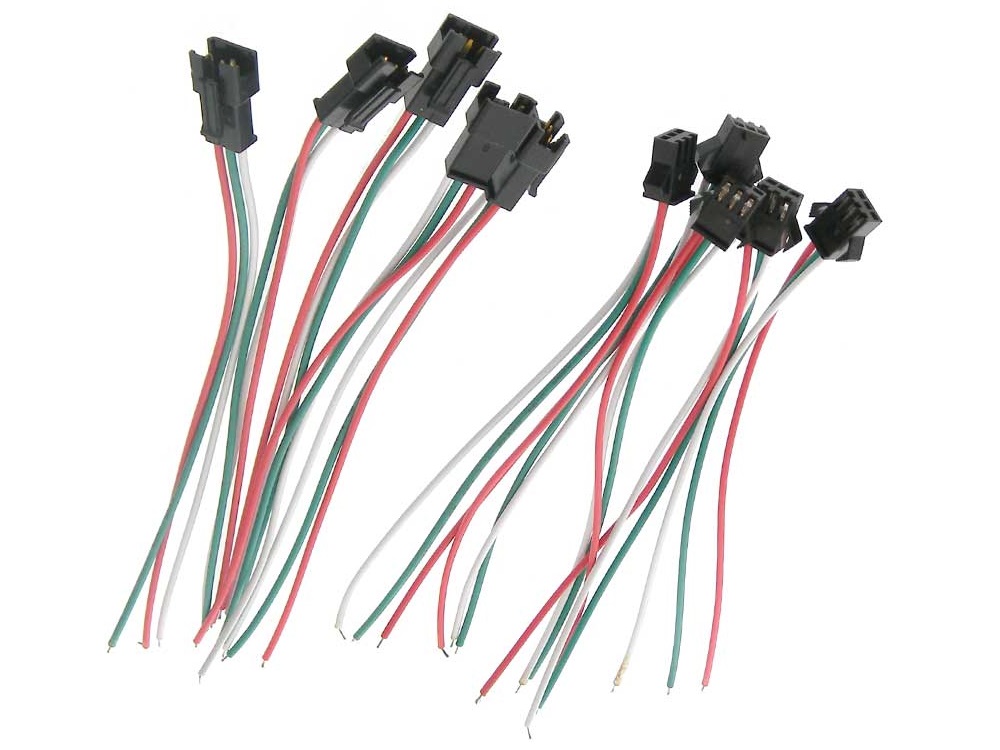
A pigtail connector is a short length of insulated wire—typically 4 to 12 inches long—with a pre-attached terminal, plug, or connector housing on one end. The opposite end is left bare or stripped, ready to be spliced, crimped, or soldered into an existing circuit.
The name comes from the wire’s resemblance to a pig’s curly tail: a short, flexible “tail” extending from the main wiring run. In practical terms, a pigtail acts as an adapter or extension that lets you join multiple wires together, connect a device to an existing harness, or repair a damaged connector without rebuilding the entire wiring assembly.
Pigtail connectors are used everywhere—from automotive sensors and trailer lights to ceiling fans, outlets, and industrial machinery. They’re the unsung workhorse of any wire harness assembly.
Why Pigtail Connectors Matter
Replacing a full wire harness because of one damaged connector is expensive and time-consuming. Pigtails let you repair only the failed section, which:
- Cuts labor time dramatically
- Reduces parts cost
- Preserves the integrity of the original harness
- Eliminates the need for specialized OEM tools in many cases
For automotive shops, a pigtail repair can turn a 4-hour harness replacement into a 20-minute fix. For OEMs, pigtails standardize connections across product lines, simplifying both manufacturing and field service.
Types of Pigtail Connectors
Not all pigtails are created equal. The right type depends on application, current load, environment, and the connector standard you need to match.
1. Automotive Pigtail Connectors
Designed to match OEM connector housings—Delphi, Molex, TE Connectivity, Sumitomo, and others. Common applications include:
- Oxygen (O2) sensors
- Mass airflow (MAF) sensors
- Headlights, taillights, and turn signals
- Ignition coils and fuel injectors
- ABS and transmission sensors
2. Residential Electrical Pigtails
Short copper wires (usually 6 inches) used to connect multiple wires to a single terminal on an outlet, switch, or light fixture. They simplify code-compliant connections, especially when more than two wires need to terminate at one screw.
3. Trailer and RV Pigtails
4-way, 5-way, 6-way, and 7-way pigtail harnesses used to connect trailer lighting and braking systems to a tow vehicle.
4. Industrial and Marine Pigtails
Heavy-gauge, sealed pigtails rated for vibration, moisture, fuel, and chemical exposure. Often built with tinned copper conductors and IP67/IP68-rated housings.
5. LED and Lighting Pigtails
Small-gauge pigtails (often 18–22 AWG) for LED strips, downlights, and signage—commonly with JST, Molex Mini-Fit, or DC barrel connectors.
Materials and Construction
Quality pigtails come down to three things: conductor, insulation, and terminal.
| Component | Common Materials | What to Look For |
|---|---|---|
| Conductor | Bare or tinned copper | Stranded for flexibility, tinned for corrosion resistance |
| Insulation | PVC, XLPE, TPE, silicone | Temperature rating matches application (105°C, 125°C, 200°C) |
| Terminal | Brass, phosphor bronze, gold-plated | OEM-matched plating for low contact resistance |
| Housing | Nylon, PBT, thermoplastic | UV and heat resistant for automotive/outdoor use |
For harsh environments, look for GXL, TXL, or SXL wire with cross-linked insulation, sealed terminals, and silicone-filled boots.
Common Applications
Pigtail connectors show up wherever a wire needs to be split, extended, or repaired:
- Automotive repair – replacing burnt or corroded OEM connectors
- Residential wiring – combining neutrals or grounds at a junction box
- Marine electrical – sealed connections for bilge pumps, navigation lights
- Solar and battery systems – MC4 pigtails for PV panels and battery banks
- Industrial controls – sensor and actuator connections on PLC-driven equipment
- Robotics and prototyping – quick, modular wiring for development boards
Many of these applications are exactly where a custom wiring solution outperforms a generic off-the-shelf harness.
Advantages of Pigtail Connectors
- Faster repairs – splice in a new pigtail instead of replacing the harness
- Lower cost – a $5 pigtail beats a $300 harness every time
- Code compliance – essential for NEC-compliant residential junction box wiring
- OEM-matched quality – maintains original connector fit and sealing
- Flexible inventory – stock common pigtails to cover hundreds of repair scenarios
- Cleaner installations – reduces wire clutter and improves serviceability
Installation Tips
A pigtail is only as reliable as its installation. Follow these steps to get it right the first time.
1. Strip Cleanly
Use a calibrated wire stripper sized for the gauge. Nicking the copper reduces current capacity and causes premature failure.
2. Choose the Right Splice Method
- Crimp + heat-shrink butt connectors – fastest, most reliable for automotive
- Solder + adhesive heat-shrink – best for high-vibration or sealed environments
- Wire nuts – acceptable for residential, never for automotive
3. Match Wire Gauge
Always match (or exceed) the original wire gauge. Going thinner causes voltage drop and heat buildup.
4. Seal Against Moisture
For automotive, marine, or outdoor applications, use adhesive-lined heat-shrink tubing. A loose, unsealed splice is a corrosion failure waiting to happen.
5. Strain-Relief the Splice
Secure the splice with electrical tape, harness wrap, or cable ties so vibration doesn’t fatigue the conductor.
6. Verify Polarity and Pinout
Double-check the OEM wiring diagram before crimping. A reversed pin on an O2 sensor or ABS connector can damage the ECU.
Troubleshooting Pigtail Connector Issues
When a pigtail-repaired circuit acts up, the problem is almost always in one of four places:
| Symptom | Likely Cause | Fix |
|---|---|---|
| Intermittent signal | Loose crimp or oxidized terminal | Re-crimp or replace terminal |
| Burnt insulation | Undersized wire gauge | Upgrade to correct AWG |
| Corrosion at splice | Unsealed connection | Replace with adhesive heat-shrink butt connector |
| Connector won’t seat | Wrong housing or bent pin | Verify OEM part number, replace pigtail |
A multimeter and a wiring diagram solve 90% of pigtail-related failures. Check continuity, voltage drop across the splice, and resistance against spec.
Maintenance Best Practices
Pigtails are low-maintenance, but a quick inspection during routine service extends their life:
- Visually check for cracked insulation, melted housings, or green corrosion on terminals
- Wiggle-test the connector while monitoring a live signal—look for dropouts
- Reseal exposed splices with fresh heat-shrink if the original has degraded
- For sealed automotive connectors, replace silicone seals and weather pack gaskets if compromised
- Apply dielectric grease to terminals in marine or outdoor applications
How to Choose the Right Pigtail Connector
Before you order, confirm five things:
- OEM part number or connector series – Delphi 12162825, Molex MX150, etc.
- Wire gauge (AWG) – must match circuit current draw
- Number of pins – 2-pin, 3-pin, 4-pin, etc.
- Sealed vs. unsealed – environment dictates this
- Wire length – long enough to reach the splice point without strain
When OEM pigtails are discontinued or you need volume for a production line, working with a custom harness manufacturer is faster and more cost-effective than sourcing piece-by-piece.
FAQ
What’s the difference between a pigtail connector and a regular connector?
A regular connector mates two assembled wire ends. A pigtail connector has one assembled end (the plug or terminal) and one bare end ready to be spliced into an existing circuit—making it ideal for repairs and extensions.
Are pigtail connectors code-compliant in residential wiring?
Yes. The NEC permits—and in many cases requires—pigtails when more than one wire needs to land on a single terminal. They’re standard practice for outlets, switches, and junction boxes.
Can I make my own pigtail connector?
Yes, if you have the correct terminals, housing, and a calibrated crimping tool. For OEM automotive connectors, however, factory-assembled pigtails are usually faster, cheaper, and more reliable than DIY.
How long should a pigtail wire be?
For residential work, 6 inches is standard. For automotive repairs, 6–12 inches gives enough slack to position the splice away from heat or moving parts without creating excess wire to manage.
Will a pigtail repair affect my vehicle warranty or pass inspection?
A properly installed, OEM-matched pigtail with sealed splices is widely accepted by dealers and inspection stations. Poor splices—taped joints, mismatched gauges, exposed copper—will fail inspection and may void warranty coverage on related systems.
Conclusion
A pigtail connector is one of the simplest yet most valuable components in modern electrical work. It turns expensive harness replacements into quick repairs, keeps residential wiring code-compliant, and gives engineers a flexible building block for custom assemblies. The key to long-term reliability comes down to three things: the right part, a clean installation, and proper sealing.
Whether you’re sourcing OEM-matched automotive pigtails, building a complete wire harness assembly, or need a fully engineered custom wiring solution for your product line, partnering with an experienced manufacturer ensures every connection meets spec the first time.